In this blog post I'd like to discuss how to host webservices on a Windows Embedded Compact device. You can certainly consume webservices on a smart device using managed code, but hosting a webservice on the device is unfortunately not possible using managed code. So it's back to good old native code again!
I will use gSOAP, a third party framework, that will do most of the nitty gritty work for us. Sounds easy right? Let's get started!
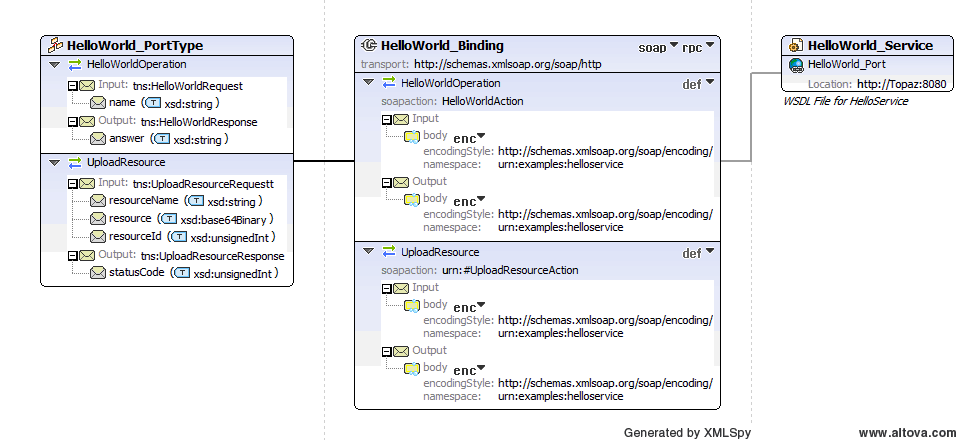
The most important part is the WSDL (Web Services Description Language) file. The WSDL file is an XML document that describes the interface and thus which methods we want to expose and host on our device. I won't spend much time explaining the WSDL syntax as there are lots of online WSDL tutorials available that explain the syntax much better than I ever could.
For now I just created a very simple WSDL file that describes one very simple webservice method: string HelloWorld(string name)
The wsdl:
As you can see there are 6 main tags in the WSDL within the mandatory <definition></definition> tags:
- types
- Provides data type(s) used for the method parameters and return values.
- message
- Represents an abstract definition of the data being transmitted. A message consists of logical parts, each of which is associated with a definition within some type system.
- portType
- A set of abstract operations. Each operation refers to an input message and output messages.
- binding
- Specifies concrete protocol and data format specifications for the operations and messages defined by a particular portType.
- port
- Specifies an address for a binding, thus defining a single communication endpoint.
- service
- Used to aggregate a set of related ports and to set the network location of the actual service.
Basically Type, Message and portType describe the webservice methods used and binding, port and service describe how to transfer the data over the socket.
The location contains the IP address or hostname of the target that runs the server hosting the webservice. In this example I use a Topaz device (you would normally set this to the IP address or hostname assigned to your device).
After this very brief WSDL description let's set up our Visual Studio 2008 project. This will be the biggest task.
Before we can create the actual VS2008 project we need to perform a couple of steps (described in more detail below):
- Import the WSDL in an emtpy project
- Let gSOAP generate a header file via wsdl2header.exe
- Let gSOAP generate the corresponding implementation *.cpp file
- Implement our methods
Because gSOAP generates a lot files I prefer to separate the generated files from the actual implementation files so that you only have to focus on your implementation and not what is being generated by gSOAP. So let’s begin and create an empty project in Visual Studio 2008 and add the WSDL file.
Step 1: Import the WSDL in an empty project
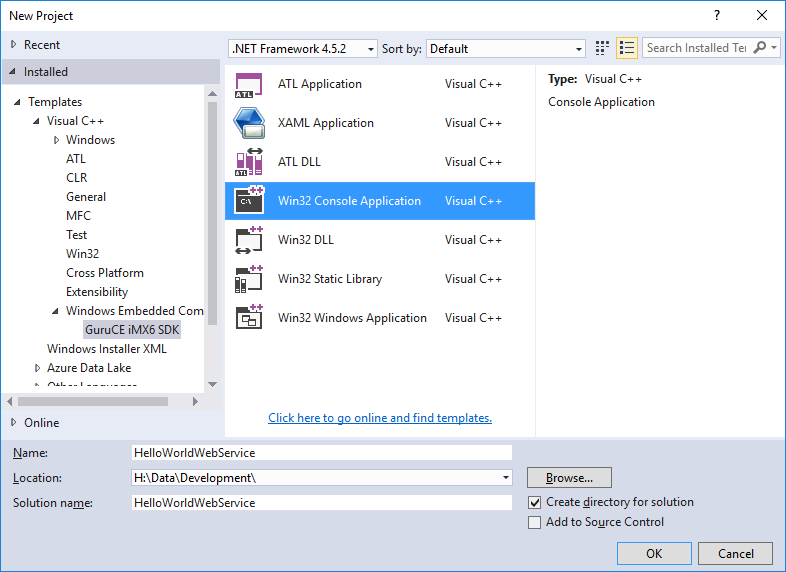
Open Visual Studio and create a new C++ smart device project (File menu | New | Project) and enter HelloWorldWebService as the name of the solution.

Select Ok, and click next on the "Welcome to the Win32 Smart Device Project Wizard" dialog. In the "platforms" dialog select the SDK for your target device. As you can see I chose the Topaz device (http://guruce.com/topaz). Select next:


In the "project setttings" dialog select "console application" and "empty project" and click finish.

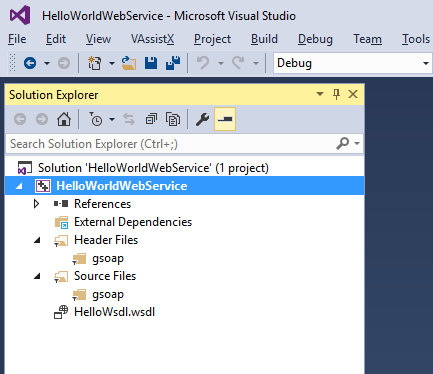
When the solution is created, go to the solution explorer (normally this would be visible by default but if not: go to View | Solution Explorer) and add a new filter "gsoap" in the "header" section (right click "Header Files", choose Add->New Filter) and do the same in the "source" section. We'll get gSOAP to generate its files there. Now create a new file with extension .wsdl in your solution's folder. Copy the contents of the sample WSDL above and add the WSDL file to your solution (right click on the solution and select “add existing item”). I've named the file HelloWsdl.wsdl. It should look something like this:

Step 2: Let gSOAP generate the header file from our wsdl.
First download gSOAP in order to get the tools needed. You can download gSOAP from this location:
http://sourceforge.net/projects/gsoap2/files/
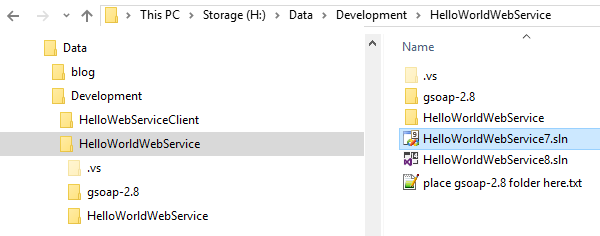
Make sure you save the extracted files in an appropriate folder for you to remember because we need references to this folder within our visual studio project later on.
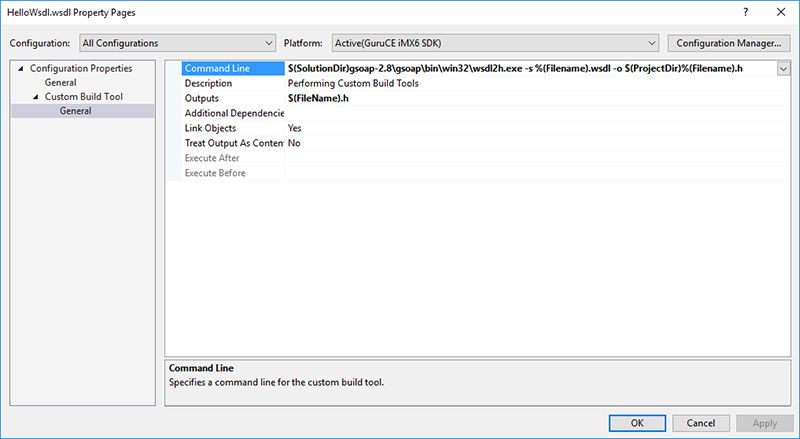
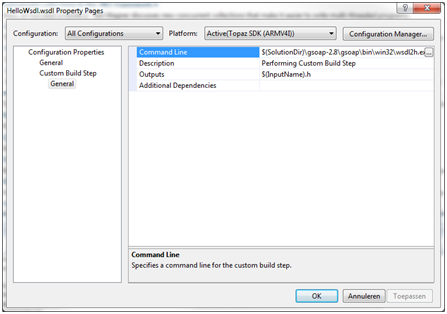
Now go back to your solution and right click on the wsdl file and select properties. In the “Custom build step“ add the following command (note that I’ve put the gSOAP tools in the $(SolutionDir); make sure you get the path right and that the solution directory doesn't contain any spaces) in the “Command Line” section:
$(SolutionDir)\gsoap-2.8\gsoap\bin\win32\wsdl2h.exe -s $(InputPath) -o $(ProjectDir)$(InputName).h
This will run the wsdl2h.exe to generate our header file. The parameters specify the input and output file. In the “Outputs” field on the property page enter:
$(InputName).h
 .
.
You need to specify something in the “outputs” field in order to make the wsld ‘compilable’. Note that the path here contains a version number (gsoap-2.8). This can change of course so keep that in mind. Also notice that I did this "setting" for "All Configurations" and not just for the current one.
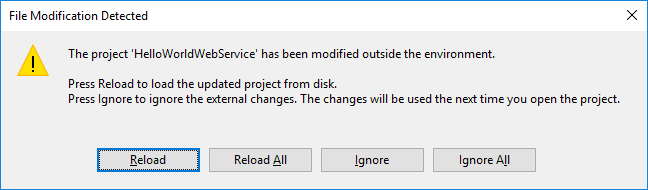
Click “Apply” and “Ok”, and then right click the wsdl file again and choose “Compile”.
Now our header (HelloWsdl.h) file is generated in the project directory and we need to add this file to the project. In the solution explorer right click on the “gsoap” folder in the header section and choose “add existing item”. Navigate to HelloWsdl.h and add it.
Let’s do the same for generating the cpp file:
Step 2: Let gSOAP generate the cpp source file.
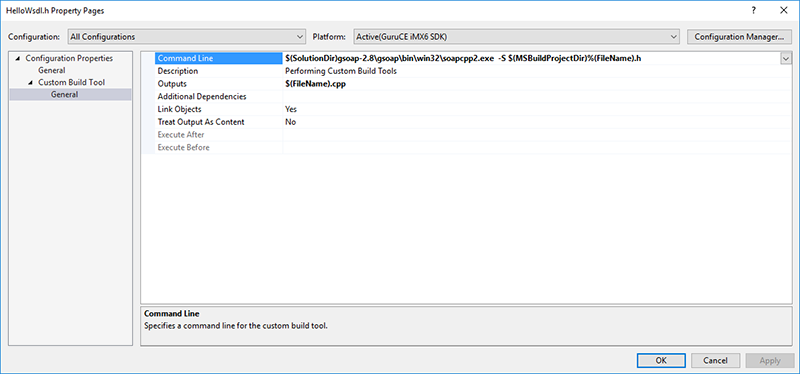
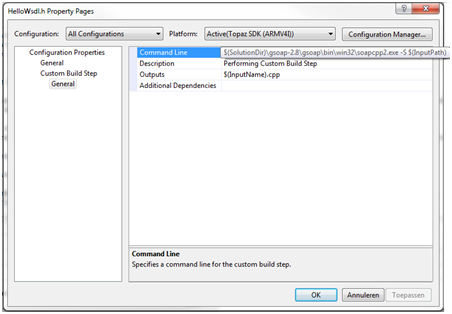
In the solution explorer right click on the HelloWsdl.h, which we just added in the previous step, and select “properties”. In the “Custom build step“ add the following command:
$(SolutionDir)\gsoap-2.8\gsoap\bin\win32\soapcpp2.exe -S $(InputPath)
In the “Outputs” field enter the following:
$(InputName).cpp
 .
.
Right click on the HelloWsdl.h file and choose "compile". This will generate a bunch of files as well, but we are not yet ready to build our solution... If you would try to build the solution at this time, like I did when I first started with gSOAP, you will run into a lot of compile errors so bear with me for a few more steps.
Right click the gSOAP folder in the header section in your solution and add these header files:
- soapH.h
- soapStub.h
Right click the gSOAP folder in the source section in your solution and add these cpp files:
- soapC.cpp
- soapServer.cpp
The next step is to add stdsoap2.h and stdsoap2.cpp to your solution. You can find these 2 files in “gsoap-2.8\gsoap”. Add them together by right clicking the project in the solution explorer and select “Add existing item”. They will automatically appear under the correct “header” and “source” sections.
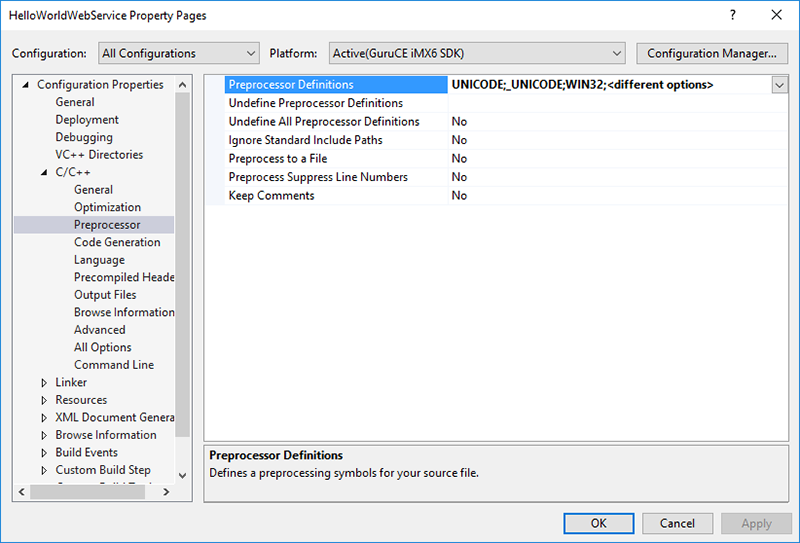
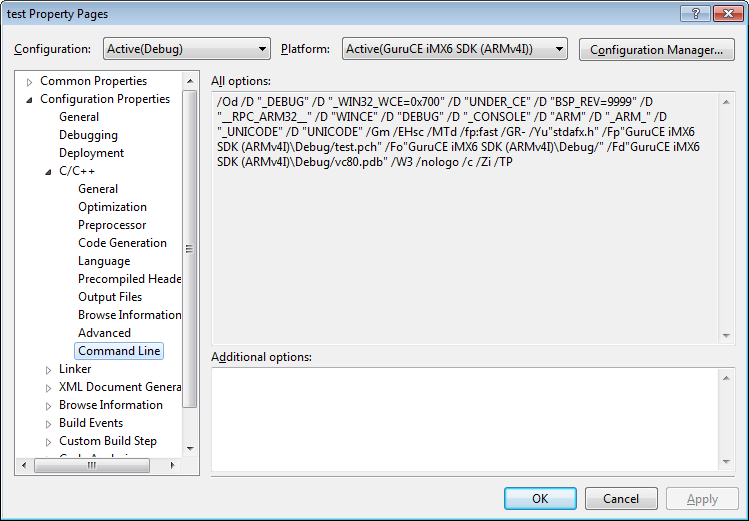
We’ve added the stdsoap2.h to our solution but we also need to add the directory where stdsoap2.h resides to the project's "include directory list". Add “$(SolutionDir)\gsoap-2.8\gsoap” to the include directorie list by right clicking the project in the solution explorer and click "Properties". In the “Configuration Properties" | C/C++ | General” section you will find “Additional Include Directories”.
Now that we’re done generating files we can actually start to code!
Step 4: Implement our methods
First we need to create the cpp source code containing the main definition and our methods. I will use 2 separate files for this. The first file will contain the server code and will listen to incoming requests/messages. The second file will actually implement our webservice's methods.
Right click on the “Source Files” in the Solution Explorer and select “New Item”. Choose C/C++ file and name the file HelloWsdl.cpp. Do exactly the same for a file called HelloWsdlMethods.cpp.
Your complete solution should now look like this:
 .
.
Let’s start with an easy one; open the HelloWsdlMethods.cpp and copy and paste the following code snippet into that file:
#include
"soapH.h"
int ns1__HelloWorldOperation(struct soap*,
char* name, /// Request parameter
char* &answer /// Response parameter
)
{
printf("Hello my method\r\n");
char* myName = {"Erwin"};
answer = myName;
return SOAP_OK;
}
Now if you have built the project prior to adding this piece of incredible intelligent code, you would have seen an unresolved external in the error list: this method. The above function is generated (or better; declared) by gSOAP and the code snippet above is the implementation. You can find the declaration of this method in the generated soapStub.h file:
/************************************************************************\
* Server-Side Operations
\************************************************************************/
SOAP_FMAC5 int SOAP_FMAC6 ns1__HelloWorld(struct soap*, char *name, char *&answer);
This is where you will find your method's declarations when you have added your own in the WSDL.
We’re almost there! The last thing we need to do is add our server code. Code that will wait for a request from any client. Below is the code needed. It may look complicated at first but don’t let it scare you. This code is taken from the gSOAP website (section 7.2.3 How to Create a Stand-Alone Server in the documentation section: link listed below) with some minor changes that I will describe below:
/** Include the namespaces struct */
#include
"HelloWorld_USCOREBinding.nsmap"
int _tmain(int argc, char* argv[])
{
struct soap soap;
int m, s; // master and slave sockets
soap_init(&soap);
soap_set_namespaces(&soap, namespaces); //** Set the namespaces **/
m = soap_bind(&soap, "", 8080, 100); //** leave the string empty and gSOAP will figure out what our "localhost" is **/
if (m < 0)
soap_print_fault(&soap, stderr);
else
{
fprintf(stderr, "Socket connection successful: master socket = %d\n", m);
for (int i = 1; ; i++)
{
s = soap_accept(&soap);
if (s < 0)
{
soap_print_fault(&soap, stderr);
break;
}
fprintf(stderr, "%d: accepted connection from IP=%d.%d.%d.%d socket=%d", i,
(soap.ip >> 24)&0xFF, (soap.ip >> 16)&0xFF, (soap.ip >> 8)&0xFF, soap.ip&0xFF, s);
if (soap_serve(&soap) != SOAP_OK) // process RPC request
soap_print_fault(&soap, stderr); // print error
fprintf(stderr, "request served\n");
soap_destroy(&soap); // clean up class instances
soap_end(&soap); // clean up everything and close socket
}
}
soap_done(&soap); // close master socket and detach context
return 0;
}
Copy and paste the code above into HelloWsld.cpp.
I've listed my changes with some comments (/** */). What is added is that we include a namespaces struct to explicitly set the correct namespaces. gSOAP (soapcpp2.exe) will not only generate code files but also a *.nsmap file which generates a static struct containing the correct namespace to use. The soap_set_namespaces() method will set this struct to use it. That’s it!
All of this may seem like a lot of work but when you are finished setting up the project every change you make in your interface (wsdl) will automatically drill down into your implementation. After setting up the project you most likely will only need to work on the wsdl file and HelloWsdlMethods.cpp to add your own methods.
Now that we've created the server on Windows CE it is time to create a client that will consume our service:
The C# Managed Client
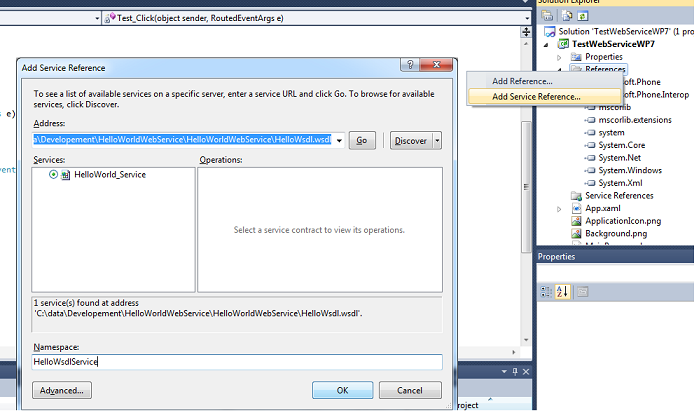
Create a C# .NET (desktop) application with just one Form (I'm not going through each single step of how to create a C# .NET application as this is outside of the scope of this article and assumed known). Add just one button to the form and give it a name. After that we need add our webservice reference to the solution (our wsdl file). In the solution explorer right click on "References" and select "Add Service Reference". In the address field enter the path and the name of the wsdl file on your local machine. In my case this is: C:\Data\Development\HelloWorldWebService\HelloWorldWebService\HelloWsdl.wsdl. I named the reference HelloWsdlMethods and this name will appear in the solution explorer. Click "Go":
 .
.
On the main form Double click on the button and paste the following code into the button handler:
private void btnTest_Click(object sender, EventArgs e)
{
try
{
HelloWsdlMethods.HelloWorld_PortTypeClient server = new HelloWsdlMethods.HelloWorld_PortTypeClient();
string name = server.HelloWorldOperation("Dummy");
MessageBox.Show(name);
}
catch (Exception error)
{
MessageBox.Show("Request failed: " + error.Message);
}
}
The code behind the button will access our server and call the webservices method. As you can see the naming is probably not the best but for this example it will do.
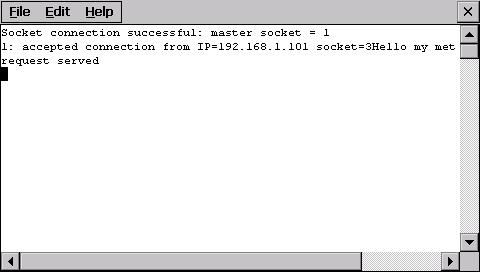
Run the server program (HelloWorldWebService.exe) on the target and run the client on the desktop. If you've done everything correct you should see the following after pressing the "Test" button:
The C# Client running on the desktop:

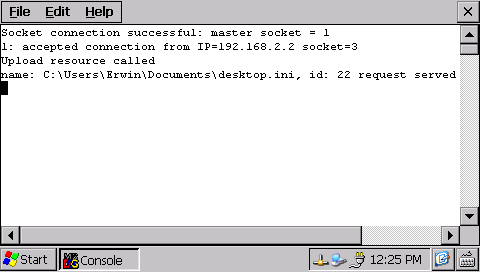
Application console on the Windows Embedded Compact device:
Things to lookout for
As you have seen there is a bit of work involved to get gSOAP to integrate nicely with Visual Studio 2008. The process is error prone and gSOAP's logging doesn't help much in most cases. In my experience there are basically three areas where things are most likely to go wrong:
- Location
This tag in the wsdl file specifies the network address on which the webservices are running. Make sure it is set right.
- Namespaces
Make sure that the namespaces used in the wsdl file match the ones in the source code (use the nsmap file) and don't forget to call soap_set_namespaces().
- Hostname
Make sure that you leave the hostname empty: soap_bind(&soap, "", 8080, 100). Specifying the hostname does not work on CE. Also the tools wsdl2h.exe and soapcpp2.exe have a lot of options that I did not discuss in this article. However, getting to know the different gSOAP options is definitely worth the time. The gSOAP website contains a wealth of information and the documentation is comprehensive.
Of course this article only shows a very simple example of how to use Webservices on Windows CE with gSOAP but it should be enough to get you going on much more complex webservices hosted on smart devices.
Please let us know if you'd like to see a more complex example (for instance transferring a file through webservices).
Good luck!